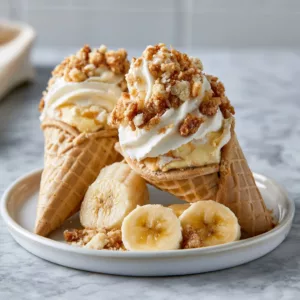
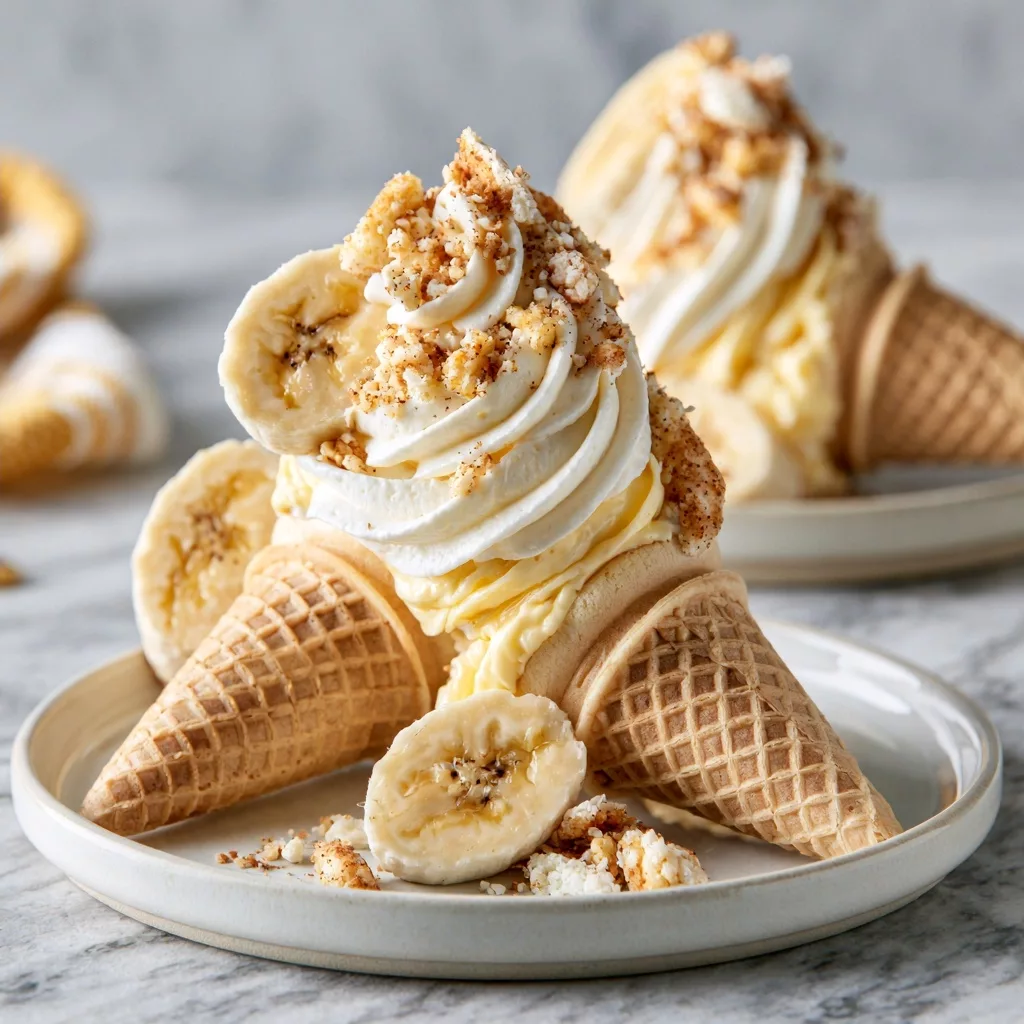
Banana Pudding Cheesecake Cones represent a delicious fusion of classic southern comfort food and portable handheld indulgence. This handheld dessert combines velvety banana-infused cheesecake filling with crunchy waffle cones for a unique textural experience. You create these treats by piping rich cream cheese mixture mixed with fresh banana slices inside crisp, chocolate-lined waffle cones. These individual servings make the perfect addition to any party dessert table or summer picnic gathering.
| Prep Time | Cook Time | Total Time | Servings | Difficulty | Cuisine |
|---|---|---|---|---|---|
| 20 minutes | 0 minutes | 2 hours 20 minutes | 8 cones | Easy | American |
Why This Recipe Works
This recipe succeeds because it reimagines a classic family favorite in a convenient, mess-free format that appeals to all ages. By focusing on high-quality ingredients like real cream cheese and ripe bananas, the structure holds firm while maintaining the creamy texture expected of a decadent cheesecake. The chocolate lining inside the cone serves a functional purpose by keeping the waffle crispy throughout the storage process.
My personal experience dictates that chilling the cheesecake batter before piping is the primary secret to success. This method allows the fats to solidify slightly, ensuring that your filling stays inside the cone without drooping or leaking. You will find that this straightforward process eliminates the need for baking, making it a reliable choice for busy schedules or hot days when you prefer to keep the kitchen cool.
Ingredients
| Ingredient | Quantity | Notes |
| Cream Cheese | 16 oz | Softened to room temperature |
| Waffle Cones | 8 count | Standard size |
| Banana Pudding Mix | 3 oz | Instant variety |
| Heavy Cream | 1 cup | Cold |
| Ripe Bananas | 2 medium | Sliced into rounds |
| Semi-sweet Chocolate Chips | 1 cup | Melted for coating |
Step-by-Step Instructions
Preparing the Cones
- Melt the chocolate chips in the microwave using short 30-second intervals until completely smooth.
- Dip the rim of each waffle cone into the melted chocolate.
- Brush the remaining chocolate inside each cone to create a protective moisture barrier.
- Place the coated cones on a parchment-lined tray and refrigerate until the chocolate hardens.
Creating the Filling
- Beat the softened cream cheese in a large mixing bowl until smooth and free of lumps.
- Add the instant banana pudding mix and beat on medium speed until well incorporated.
- Pour the heavy cream into the bowl slowly while whisking on high speed.
- Continue whisking until stiff peaks form and the mixture is light and fluffy.
Assembly
- Fold the diced banana pieces into the cream mixture using a rubber spatula.
- Transfer the mixture to a large piping bag fitted with a star-shaped tip.
- Pipe the cheesecake filling into each prepared waffle cone starting from the bottom.
- Top each cone with a dusting of crushed vanilla wafers and extra banana slices.
Chef Tips for Perfect Results
- Ensure your cream cheese is at room temperature before starting to prevent lumpy filling.
- Use a pastry brush for the internal chocolate coating to guarantee full coverage of the waffle.
- Chill the mixing bowl in the freezer for ten minutes before whipping the heavy cream.
- Pipe the filling immediately after assembly to maintain the structural integrity of the waffle cones.
Common Mistakes to Avoid
Neglecting to line the inside of the cone with chocolate results in a soggy, unappetizing dessert. The moisture from the cheesecake filling softens the cornstarch-based wafer rapidly without that protective barrier. Always check for gaps in the chocolate lining before piping your filling.
Over-mixing the heavy cream causes it to separate, creating a grainy texture rather than a smooth mousse. Stop your mixer as soon as stiff peaks appear to maintain the ideal mouthfeel for your cheesecake cones. If the filling feels too loose, refrigerate the piping bag for thirty minutes before attempting assembly.
Variations and Substitutions
| Ingredient | Substitution | Impact |
| Banana Pudding Mix | Vanilla Pudding Mix | Reduces banana intensity |
| Semi-sweet Chocolate | White Chocolate | Sweeter, creamy contrast |
| Waffle Cones | Sugar Cones | Harder crunch |
Serving Suggestions and Pairings
Serve these cones immediately for the best textural contrast between the soft filling and crisp cone. These desserts pair excellently with fresh iced tea or a warm glass of milk for a balanced snack. During summer gatherings, consider setting up a DIY station where guests can add their own toppings like whipped cream or caramel drizzle.
Storage and Reheating
| Method | Duration | Instructions |
| Refrigeration | Up to 24 hours | Store upright in a sealed container |
| Freezer | Not advised | Texture of bananas degrades upon thawing |
Nutritional Information
Approximate values per serving.
| Nutrient | Amount per Serving |
| Calories | 340 kcal |
| Protein | 5g |
| Fat | 18g |
| Carbohydrates | 42g |
Frequently Asked Questions
Can I use store-bought banana pudding instead of fresh filling?
You can use high-quality store-bought banana pudding, but you must stir in extra softened cream cheese to achieve the necessary thickness for piping. Pure pudding is too thin to hold its shape inside a vertical cone.
How do I know when the cheesecake mixture is stiff enough?
The mixture is ready when you pull the whisk out and the peaks stand straight up without curling over. This consistency confirms that the structure will hold its shape once piped into the cones.
What is the secret to fixing a runny filling?
If your filling is too runny, place the piping bag in the refrigerator for one hour to firm up the fats. You should also verify that your heavy cream was properly whipped to full stiffness.
Can I assemble these for a party ahead of time?
Assemble these treats no more than four hours before serving to ensure the waffles remain crisp. Keeping them in the refrigerator longer than this timeframe will eventually lead to moisture absorption.
Do these banana pudding cheesecake cones need specific cones?
Standard waffle cones work best because they offer a sturdy structure and sweet flavor profile. Avoid using flimsy cake cones, as they lack the physical strength required for this thick filling.
Conclusion
Banana Pudding Cheesecake Cones provide a sophisticated way to enjoy a timeless classic. By following the steps—specifically the chocolate lining technique—you ensure a delightful crunch in every bite. Whether you are hosting a lively birthday party or enjoying a quiet evening, these treats promise to impress with their rich texture and iconic flavor. Take the time to get the consistency of your filling perfect, and you will have a dessert that stands out. Grab your piping bag and start crafting these delicious banana-filled delights today.
PrintBanana Pudding Cheesecake Cones

Indulge in a delightful fusion of classic southern banana pudding and rich cheesecake, conveniently served in a crisp, chocolate-lined waffle cone. This no-bake dessert is a portable, crowd-pleasing treat perfect for summer parties or picnics. By layering a creamy banana-infused cheesecake filling with fresh banana slices inside a hardened chocolate-coated cone, you achieve a unique textural experience that keeps the waffle crunch intact. It is a simple, elegant way to serve a sophisticated, chilled dessert without ever turning on your oven.
- Prep Time: 20
- Total Time: 140
- Yield: 8 servings 1x
- Category: Desserts & Sweets
- Method: No-bake
- Cuisine: American
- Diet: Vegetarian
Ingredients
16 oz cream cheese, softened
8 standard waffle cones
3 oz instant banana pudding mix
1 cup heavy cream, cold
2 medium ripe bananas, sliced into rounds
1 cup semi-sweet chocolate chips, melted
Instructions
Melt the chocolate chips in the microwave using short 30-second intervals until completely smooth.
Dip the rim of each waffle cone into the melted chocolate.
Brush the remaining chocolate inside each cone to create a protective moisture barrier.
Place the coated cones on a parchment-lined tray and refrigerate until the chocolate hardens.
Beat the softened cream cheese in a large mixing bowl until smooth and free of lumps.
Add the instant banana pudding mix and beat on medium speed until well incorporated.
Pour the heavy cream into the bowl slowly while whisking on high speed until the mixture is thick and fluffy.
Chill the cheesecake batter for about 2 hours to allow it to set.
Pipe the cheesecake filling into the prepared cones, alternating with layers of banana slices.
Serve immediately or keep refrigerated until ready to enjoy.
Notes
Chilling the cheesecake batter before piping is essential to ensure the filling holds its shape inside the cones. Ensure the chocolate lining is fully set before adding the filling to prevent the cones from becoming soggy. Store in the refrigerator if not serving immediately.
Nutrition
- Serving Size: 1 cone
- Calories: 420
- Sugar: 28g
- Sodium: 210mg
- Fat: 24g
- Saturated Fat: 14g
- Carbohydrates: 45g
- Fiber: 2g
- Protein: 6g
- Cholesterol: 75mg